If you’ve ever tried to fry bacon under a finicky ceiling sensor, you already know that smoke detectors have opinions. They chirp when batteries go low, they complain about steamy showers, and they absolutely refuse to be ignored. In a condo or townhome, those opinions matter more than you think. Multi‑unit buildings have different fire dynamics, neighbor-to-neighbor risk, and building code twists that surprise even seasoned homeowners. The trick is not just installing smoke detectors, but installing the right detectors in the right places, wired and interlinked in a way that respects both safety and the structure’s layout.
I’ve walked into units where the original builder nailed placement perfectly, and others where a smoke alarm lived three feet from a bathroom fan and had a meltdown every time someone used hot water. Here’s the good news. With thoughtful planning, updated hardware, and clean electrical work, you can create a network of alarms that stays quiet when it should and screams when it must. That’s the entire point.
Why condos and townhomes aren’t just “houses with shared walls”
Fire spreads differently across shared structures. Vertical shafts such as chases, plumbing stacks, and stairwells act like chimneys, pulling smoke through a building faster than most people expect. A kitchen fire two floors above can set off your hall detector while you’re still deciding between coffee and tea. Sound carries too, which is why building codes often call for interconnection, so every alarm sings in unison. When done well, you can evacuate quickly, help neighbors, and get the right people to the right places before smoke has time to become toxic.
Space constraints add more wrinkles. Low ceilings, mezzanines, skylights, exposed beams, and that stylish sloped loft you love all affect detector placement. Condos frequently have mixed spaces: an open kitchen that bleeds into a living room, bedrooms along a corridor, plus a laundry closet tucked behind bifold doors. Each one invites smoke or heat in specific ways. Getting placement wrong means nuisance trips or delayed detection, both of which erode trust. If your alarm scolds you for toast every other day, you’ll ignore it when it truly matters. That’s not a habit anyone wants.
The code lens, without the legalese
Local codes vary, but the broad strokes are consistent because they lean on long‑tested standards. You want smoke alarms inside every bedroom, in hallways outside sleeping areas, and on each level of the home. For condos and townhomes, detectors often must be hardwired with battery backup and interconnected. If one sounds, they all do. In units with attached garages, a heat detector designed for garages is standard, since cold temperatures and car exhaust can confuse typical smoke sensors.
Heights matter. Put alarms on the ceiling when you can, since smoke rises. If you must use a wall, keep the unit within a foot of the ceiling. Sloped ceilings call for placement near the peak but pulled away from the absolute highest point, where dead air can trap smoke away from the sensor. Keep distance from HVAC vents, kitchen range hoods, bathroom doors that spew steam, and the top edge of a ceiling fan. Think airflow paths, not just measurement tape.
When renovations or Tenant Improvements happen inside a condo, coordination with the building’s strata, HOA, or property manager keeps inspectors happy. You may need to align with common-area systems or existing wiring trunks. I’ve had projects where a single new bedroom created the need to extend an interconnect loop across three devices, and another where battery‑only units were approved due to concrete ceilings that would have required coring and fire‑stopping in a post‑tension slab. Good planning avoids arguments and change orders.
Ionization, photoelectric, and dual‑sensor, without the jargon headache
There are two main smoke detection technologies and you’ll often see them combined:
Photoelectric: These excel at detecting smoldering, slow‑burn fires that generate lots of smoke before open flame. Think upholstered furniture with a dropped cigarette, or an electrical wire overheating behind drywall. They also produce fewer nuisance alarms from cooking vapor.
Ionization: These respond faster to flaming fires that erupt quickly. The typical example is a grease flare‑up or a paper basket catching fire. They can be twitchy near kitchens, which is why placement distance is crucial.
Dual‑sensor models combine both. In condos and townhomes, photoelectric models tend to be preferred near living areas and hallways. Ionization units can be useful in certain spots farther from kitchens. If you want a one‑device solution, a quality dual‑sensor unit earns its keep. There are also multi‑criteria sensors that blend photoelectric with heat and even carbon monoxide sensing in a single head, especially useful in tighter layouts where device clutter is an issue.
The quiet revolution of interconnected and smart alarms
Interconnection used to require a three‑wire link across every device. In concrete high‑rises or beautifully finished townhomes with no attic access, that can be a headache. Now, listed wireless interconnect options exist, which let compliant detectors talk to each other without stringing new cable. You still need power to each device if the code calls for hardwiring, but you skip the frustration of fishing an interconnect through steel studs and fire‑rated assemblies.
Smart Home Device Installation has changed how residents interact with safety. Decent smart alarms let you see which unit triggered, hush a nuisance alarm within code‑approved limits, and get a mobile alert if you’re out for the weekend. A smart system connected to a power monitor or an EV charger app makes for a tidy dashboard, but keep eyes open. If a smart device needs Wi‑Fi for advanced features, test coverage in the hallway and bedrooms before committing. And verify UL listings, proper local approvals, and whether the HOA allows connected devices that could, in theory, upload data. Privacy policies exist for a reason.
Kitchens without constant scolding
Every homeowner learns the 20‑foot rule the hard way. Put a traditional ionization alarm right outside an open kitchen and you’ll meet the chirp chorus after every sear. The better approach is a photoelectric alarm in the adjacent area with adequate setback, or a heat detector if the space layout allows and local rules permit. Some manufacturers make “kitchen smoke alarms” tuned to ignore common cooking aerosols, but they are not magic. Airflow studies and simple common sense make a bigger difference: use the range hood, avoid placing a detector above a toaster or air fryer, and keep a ceiling fan from blasting smoke into a sensor.
Where carbon monoxide belongs in the plan
Most condo and townhome fires involve smoke first, but carbon monoxide (CO) is the silent risk. If your building has gas appliances, fireplaces, or an attached garage, CO alarms are critical. Combination smoke/CO units simplify installation and maintenance. Place them on each level, near sleeping areas, and in or just outside rooms with gas appliances when required or recommended. Don’t mount CO units next to bathrooms or directly over flame-producing devices. And remember, CO spreads evenly over time, so height is less fussy than with smoke. What matters is proximity to where people sleep and where CO sources live.
The nuts and bolts of a clean install
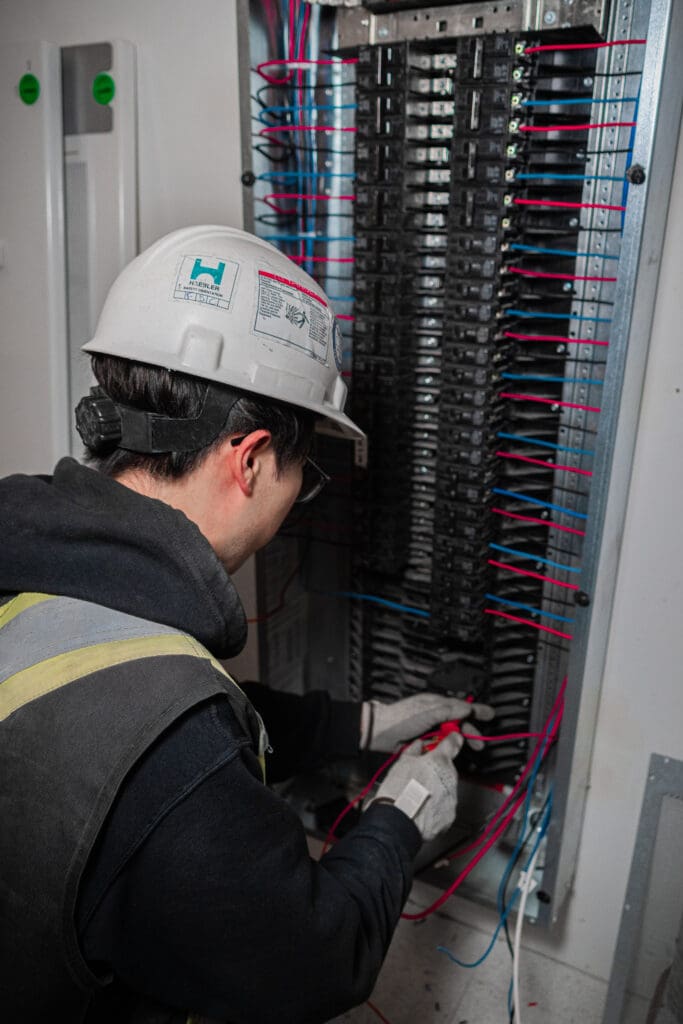
Good installation looks simple afterward. Getting there takes craft. A Residential Electrician knows to map each device, confirm power availability, assess interconnect routes, and plan for battery backup. In a retrofit, wire pulls must respect fire‑rated walls and penetrations need proper fire-stopping sealant. In a new build or full gut renovation, it’s smart to prewire interconnect and dedicate a circuit tied to the lighting or a commonly used circuit so a tripped breaker gets noticed.
Hardwired devices should have a tamper‑resistant wall or ceiling box with enough cubic inches for the conductors and pigtails. We avoid twisting conductors like spaghetti inside a shallow box. The strain relief matters, the splices matter, the wirenuts matter. If you’ve ever opened a device to find a tangle of loose copper, you know the anxiety. In condos, neatly labeled circuits help during emergencies. Electricians who treat labeling as optional make future service harder and more expensive.
The battery: not a side character
Most current alarms use sealed 10‑year lithium batteries when the device is standalone or a backup if hardwired. They cost more upfront, but you skip annual 9‑volt scavenger hunts. If you have older devices with replaceable batteries, put a date on the cover with a permanent marker. When your device chirps at two in the morning, you’ll care more about the last change date than you think. Pro tip: the “low battery season” is winter, when colder air thickens and batteries sag. Changing them proactively in the fall cuts down on rude awakenings.
Interference, false trips, and the weird stuff we see
I once visited a top‑floor corner unit that chirped randomly every few days. We swapped batteries, tested lines, replaced the device, and still heard phantom beeps at irregular intervals. The culprit was a nearby smart speaker’s ultrasonic pest repellent feature interacting with the photoelectric chamber. Turned off the feature, problem gone. Another case involved a laundry closet with a louvered door. Steam from a dryer vent leak tripped the hallway detector every Sunday. Tightened the vent connection and the “Sunday siren” retired.
If a detector trips intermittently, think environment first. Drafts can shuttle kitchen aerosols to a device twenty feet away. An HVAC return can create a pressure path that funnels steam right past the optical sensor. A ceiling fan on a high setting can stir up dust that settles on the detector’s screen. Gentle vacuuming with a brush attachment once or twice a year does wonders.
Working inside the rules of shared buildings
Condo bylaws and HOA rules often specify approved brands, interconnect requirements, maintenance schedules, and who can do the work. A Commercial Electrician working in common spaces coordinates with the fire panel vendor, while a Residential Electrician handles the private unit installs. Common areas may already have an addressable fire alarm system monitored 24/7. Your unit devices might be standalone or supervised through the building system depending on design and age. If tie‑in is required, you’ll need a permit and a technician certified to work on that specific panel brand.
For Tenant Improvements, include smoke and CO updates in the scope. If you’re adding a bedroom by splitting a long den, you’ll need a new device inside the created room and in the adjoining hallway. It is cheaper to do this while the walls are open than to fish wires afterward. Plan for it when bidding the project and coordinate with the inspector so sign‑off is smooth.
How smoke detection pairs with other electrical upgrades
Safe homes are systems, not fragments. I rarely leave a unit after a Smoke Detector Installation without spotting two or three related upgrades that would materially improve safety and comfort.
- Surge Protection Installation: Building power can be dirty, with elevator inrush and neighboring loads spiking lines. A panel‑level surge protector shields smart alarms, thermostats, and Wi‑Fi gear that supports notifications. Home Generator Installation or battery backup: Townhomes sometimes have standalone panels where backup power makes sense. If you use medical devices or have remote work needs, pairing a backup system with your safety network keeps the lights on when the grid blinks. Smart Thermostat Installation: Tying occupancy sensors and HVAC run data to your smart detector system cuts nuisance trips from kitchen smoke, since better ventilation is half the battle. EV Charger Installations: If you park in an attached garage, add a rated heat detector in the garage space as required, verify ventilation, and consider dedicated circuits that avoid overloading. Charging systems are safe when installed properly, but more load means more diligence. Solar Panel Installation: Solar changes your electrical topology. If you add a hybrid inverter or battery, verify that alarm circuits remain powered during grid islanding. Keeping life‑safety devices alive during outages takes specific wiring strategies.
A company that handles end‑to‑end Electrician Services keeps you from playing referee between vendors. TDR Electric, for example, supports Electrical Maintenance Services and Emergency Electrical Services, so a midnight chirp from a failing unit or a tripped arc‑fault breaker doesn’t become a weeklong soap opera. If your building requires Electrical Vault Cleaning in the common service areas, coordinate schedules so the dust and vibration from that work doesn’t arrive the same day you test and certify new detectors.
Age matters: replacement cycles and honest timelines
Smoke alarms aren’t immortal. Most are rated for 8 to 10 years. You’ll find a manufacture date on the back. If it’s older than your favorite streaming service, it belongs in retirement. CO sensors age out faster, often around 5 to 7 years. Combo units typically follow the shorter lifespan. If you move into a new condo, check dates during the first week. I’ve pulled 15‑year‑old devices out of units that passed multiple sales without anyone noticing. The alarm chirped occasionally, the resident assumed battery, then forgot.
When replacing, do it in groups. If one device fails age or test, consider refreshing the whole set so they match in brand, interconnect protocol, and maintenance cycle. It is less headache to replace four at once and mark the calendar for a future swap than to play whack‑a‑mole every seven months.
Sound levels and audibility in multi‑room layouts
Alarms need to wake sleepers. Closed doors and long corridors muffle sound faster than you’d think. Devices are generally rated at 85 decibels at ten feet, but a solid core bedroom door can shave that dramatically. Interconnection isn’t just a code checkbox, it is how you get even coverage. If you have a lofted bedroom or a split‑level townhome, run a quick test. Close doors, stand where you sleep, and press the test button. If it sounds polite rather than urgent, placement may need a rethink.
For residents with hearing impairment, there are listed strobes and bed shakers that tie into interconnect systems. These save https://elliottvxcr990.lucialpiazzale.com/code-compliant-smoke-detector-installation-for-safety-in-vancouver lives. The compact gadgets available now integrate cleanly without turning a bedroom into a control room.
Why professional installation pays for itself
Yes, a determined DIYer can mount alarms and swap a few hardwired heads. The difference shows up when your ceiling is post‑tension concrete, your interconnect is shared across two remodel phases, and the HOA wants a certificate with device model numbers and serials. A pro knows which devices behave near busy kitchens, how to route cables without violating fire separations, and the difference between a quiet test and a proper functional test with smoke or canned aerosol.
A seasoned technician brings more than tools. They bring pattern recognition. After a few hundred units, you see that a detector two feet off a bathroom door is just asking to whine, that a stairwell landing can trap a hot air pocket, and that a laundry closet without a louver acts like a steam grenade. An experienced Residential Electrician can tame that chaos in a single visit. For larger complexes, a Commercial Electrician coordinates with building management to stage work floor by floor, minimize downtime, and keep documentation tidy.
The brief, practical checklist
- Map every sleeping area, corridor, and level before buying devices. Choose photoelectric near living spaces, consider dual‑sensor for broad coverage, and use listed heat detectors for garages. Respect distance from kitchens, bathrooms, ceiling fans, and vents. Interconnect wherever code requires, using listed wireless options if running cable will damage fire separations. Date your devices and keep records, especially in buildings with regular inspections.
Testing the right way, not the loud way
The test button checks the circuit and the horn, which is important, but it doesn’t prove the sensor can actually smell smoke. Use a can of test aerosol once or twice a year. Follow the label and don’t soak the device. You should get a prompt trip, interconnect confirmation, and a return to normal within a minute or two after clearing the air. If a device refuses to reset or lags badly, replace it. While you’re at it, vacuum the exterior grill. You’ll be amazed how much dust a ceiling collects in a year.
For CO units, the test button is acceptable for routine checks because safe CO test kits are more specialized. If your CO alarm trips without an obvious reason, treat it seriously and ventilate. Utilities and fire departments would rather investigate a false trip than miss a real one.
When alarms meet insurance and real‑life stakes
Insurance adjusters care about smoke detectors. A claim after a kitchen fire goes smoother when your devices were in the right locations, interconnected, and within their service life. Some carriers provide discounts if you install monitored systems. Even without a discount, the math works. A smoke detector network costs far less than replacing a kitchen or living room set soot‑damaged by a slow smolder that nobody noticed.
The human side matters more. I once revisited a townhome a month after we reworked its detectors and added a heat sensor in the garage. A lithium battery for a cordless tool puffed and failed while charging. The garage heat detector tripped, the interconnect woke the family, and they pulled the car out and closed the breaker before anything spread. Smoke stains on drywall, scent of singed plastic, no structural damage, no hospital visits. That is the outcome you design for.
Building a plan that fits your space, not a brochure
Every condo and townhome tells a story in drywall and ductwork. The best Smoke Detector Installation listens to that story. Start by walking the space with a quiet, observant eye. Where will smoke travel first from a kitchen mishap? How does the stairwell change airflow? Are bedrooms tucked away behind heavy doors? What do the bylaws require? What will be easy to maintain five years from now?
From there, align the pieces. If you are already scheduling Electrical Maintenance Services, add a detector audit. If you are planning EV Charger Installations, confirm garage detection. If a solar upgrade is on the horizon, make sure the alarm network remains powered during outages. If your building management needs proof, provide a simple one‑page summary: device list, install dates, locations, test results, and brand models. This level of order saves time during future inspections and keeps everyone on the same page.
TDR Electric has built a reputation for clear communication and tidy work across Electrician Services that touch daily life. Whether it’s a straight‑forward Smoke Detector Installation, Smart Home Device Installation tuned for real living, or Surge Protection Installation that safeguards a growing stack of electronics, the philosophy doesn’t change. Make it safe, make it durable, and make it easy to live with. The alarms will still have opinions, but they’ll keep them to themselves until the moment you want them loud.
Name: TDR Electric Inc.
Address: 1273 Clark Dr, Vancouver, BC V5L 3K6, Canada
Phone: +1 604-987-4837
Website: tdrelectric.ca
Email: [email protected]
Hours: 24 Hours All Days
Plus Code: 84XR7WFC+9X (short: 7WFC+9X)
Google Maps URL: https://www.google.com/maps/place/TDR+Electric+Inc./@49.273397,-123.0801556,17z/data=!3m1!4b1!4m6!3m5!1s0x5486704eeda05d95:0xf424cd92195e1778!8m2!3d49.273397!4d-123.0775807!16s%2Fg%2F11b7y791rn
Map Embed:
Socials:
https://www.facebook.com/TDRelectric/
https://www.instagram.com/tdrelectric/
https://www.linkedin.com/company/tdr-electric-inc/
https://www.youtube.com/@TDRElectricInc
TDR Electric Inc.
TDR Electric Inc. in Vancouver is a local electrical contractor serving Greater Vancouver.
Homeowners choose TDR Electric for highly rated electrical work across the Lower Mainland.
Our team provides residential services like EV charger installations in Vancouver.
Looking to book service? Call +1 604-987-4837 to schedule an appointment with a highly rated team.
For service requests, email [email protected] and a quality-driven electrician will respond.
Find TDR Electric Inc. at 1273 Clark Dr, Vancouver, BC V5L 3K6, Canada for a experienced electrical partner.
Google Maps directions for TDR Electric Inc.: https://www.google.com/maps/place/TDR+Electric+Inc./@49.273397,-123.0775807,16z/data=!3m1!4b1!4m6!3m5!1s0x5486704eeda05d95:0xf424cd92195e1778!8m2!3d49.273397!4d-123.0775807!16s%2Fg%2F11b7y791rn!5m2!1e2!1e4
Popular Questions About TDR Electric Inc.
What services does TDR Electric Inc. offer in Vancouver?
TDR Electric Inc. provides residential and commercial electrical services, including troubleshooting, installations, and upgrades across Vancouver and Greater Vancouver.
Do you install EV chargers in Greater Vancouver?
Yes—TDR Electric Inc. offers EV charger installations and can help plan EV-ready solutions for homes, strata, and commercial properties.
Can you help with service panel upgrades and breaker issues?
Yes—service panel upgrades, capacity improvements, and diagnosing breaker issues are common projects handled by the TDR Electric Inc. team.
Do you provide commercial electrical work and tenant improvements?
Yes—TDR Electric Inc. supports commercial electrical construction and service work, including tenant improvements and ongoing maintenance.
How do I request a quote or schedule an electrician?
Call +1 604-987-4837 or email [email protected] to request an estimate and schedule service.
How can I contact TDR Electric Inc.?
Phone: +1 604-987-4837
Email: [email protected]
Website: tdrelectric.ca
Facebook: https://www.facebook.com/TDRelectric/
Instagram: https://www.instagram.com/tdrelectric/
LinkedIn: https://www.linkedin.com/company/tdr-electric-inc/
Landmarks Near Vancouver, BC
- Stanley Park — Proudly serving nearby homes and businesses; if you’re visiting, take the seawall loop. https://www.google.com/maps/search/?api=1&query=Stanley%20Park%2C%20Vancouver%2C%20BC | https://en.wikipedia.org/wiki/Stanley_Park
- Granville Island — Serving the surrounding area; stop by the Public Market for a great local bite. https://www.google.com/maps/search/?api=1&query=Granville%20Island%2C%20Vancouver%2C%20BC | https://en.wikipedia.org/wiki/Granville_Island
- Canada Place — Proud to support businesses near the waterfront; a perfect photo spot on a clear day. https://www.google.com/maps/search/?api=1&query=Canada%20Place%2C%20Vancouver%2C%20BC | https://en.wikipedia.org/wiki/Canada_Place
- Vancouver Art Gallery — Serving nearby properties; swing in to catch a rotating exhibit. https://www.google.com/maps/search/?api=1&query=Vancouver%20Art%20Gallery%2C%20Vancouver%2C%20BC | https://en.wikipedia.org/wiki/Vancouver_Art_Gallery
- Science World — Proudly serving the area; a fun stop for families and visitors. https://www.google.com/maps/search/?api=1&query=Science%20World%2C%20Vancouver%2C%20BC | https://en.wikipedia.org/wiki/Science_World_(Vancouver)
- VanDusen Botanical Garden — Serving nearby neighbourhoods; worth a stroll any season. https://www.google.com/maps/search/?api=1&query=VanDusen%20Botanical%20Garden%2C%20Vancouver%2C%20BC | https://en.wikipedia.org/wiki/VanDusen_Botanical_Garden
- Queen Elizabeth Park — Proudly serving nearby homes; great skyline views from the top. https://www.google.com/maps/search/?api=1&query=Queen%20Elizabeth%20Park%2C%20Vancouver%2C%20BC | https://en.wikipedia.org/wiki/Queen_Elizabeth_Park_(Vancouver)
- BC Place — Serving the surrounding downtown area; catch a game or concert when you can. https://www.google.com/maps/search/?api=1&query=BC%20Place%2C%20Vancouver%2C%20BC | https://en.wikipedia.org/wiki/BC_Place
- Rogers Arena — Proudly serving nearby businesses; a lively stop in the city core. https://www.google.com/maps/search/?api=1&query=Rogers%20Arena%2C%20Vancouver%2C%20BC | https://en.wikipedia.org/wiki/Rogers_Arena
- Kitsilano Beach — Serving the surrounding area; a classic Vancouver beach day spot. https://www.google.com/maps/search/?api=1&query=Kitsilano%20Beach%2C%20Vancouver%2C%20BC | https://en.wikipedia.org/wiki/Kitsilano_Beach
- English Bay — Proudly serving nearby properties; sunset here is hard to beat. https://www.google.com/maps/search/?api=1&query=English%20Bay%2C%20Vancouver%2C%20BC | https://en.wikipedia.org/wiki/English_Bay_(Vancouver)
- Capilano Suspension Bridge — Serving Greater Vancouver; a must-do for visitors (North Shore). https://www.google.com/maps/search/?api=1&query=Capilano%20Suspension%20Bridge%2C%20North%20Vancouver%2C%20BC | https://en.wikipedia.org/wiki/Capilano_Suspension_Bridge